This post may contain affiliate links. Please read our disclosure policy.
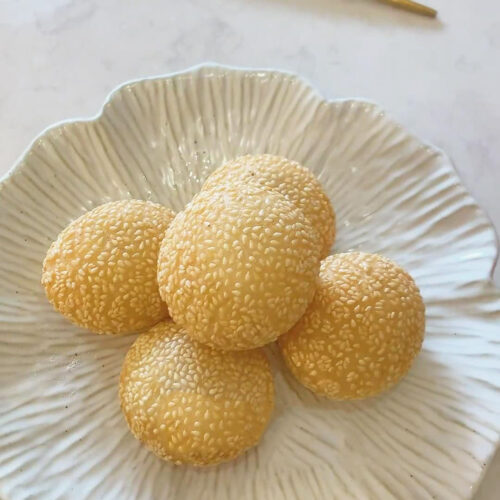
Have the most authentic sesame ball in town with my tried and tested deep-fried sesame ball recipe. Gobble up its crunchy and chewy outer layer studded with nutty sesame seeds. It has a soft, sweet filling – simply the perfect dim sum treat for breakfast or as an afternoon snack.
All About Sesame Balls
When you go to Chinatown or dim sum restaurants, it is impossible not to see these round sesame balls.
Sesame balls, also known as Zhī Má Qíu and Jiān Duī, are round-shaped treats made with glutinous rice flour dough. Thanks to the glutinous rice flour ingredient, the sesame balls are sticky and chewy.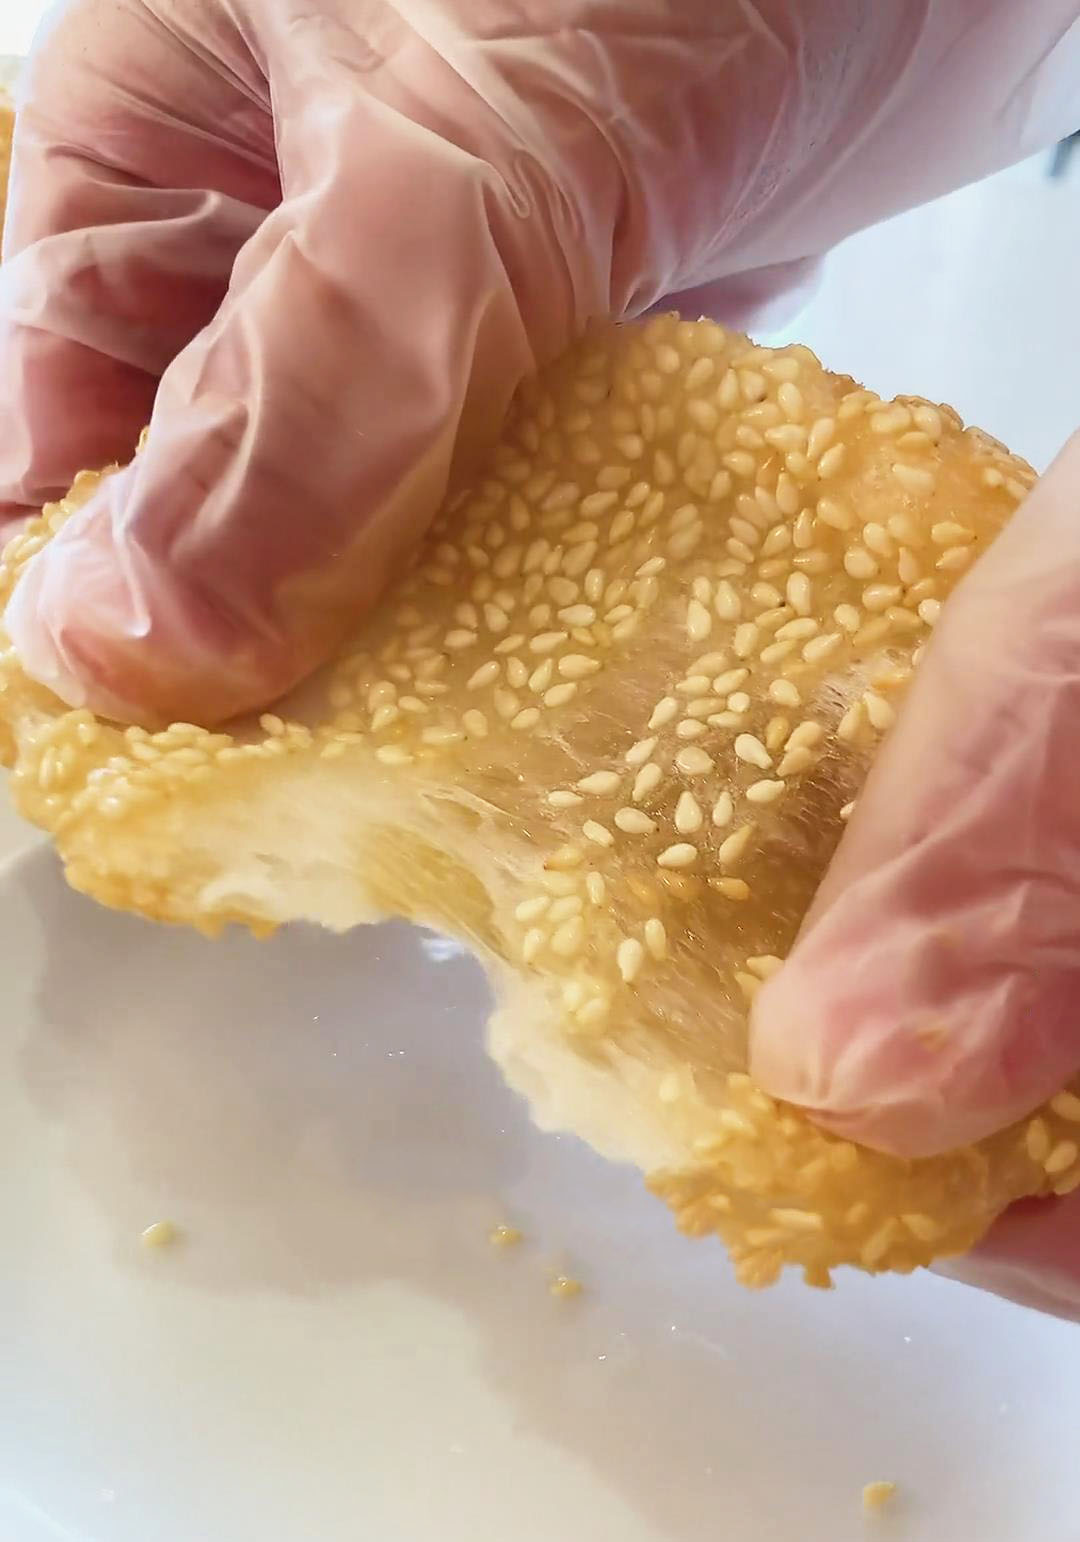
The balls are covered with white sesame seeds for a delightful crunch and nutty taste.
Creating these chewy balls is fun because they can be filled with whatever you want. whether you like the classic lotus seed paste filling or other Asian flavors like red bean paste. You can even eat this without a filling and it is still the bomb!
To cook the sesame balls, it has to be deep-fried until crispy and golden brown on the outside.
In my sesame ball recipe, you will need water, sugar, glutinous rice flour, vegetable oil, white sesame seeds, and your favorite filling. If you like sesame-infused recipes, try these recipes as well:
- Tang Yuan Recipe (Black Sesame Glutinous Rice Balls)
- Shaobing Recipe (Flaky Chinese Sesame Flatbread)
- Black Sesame Paste Recipe Using 5 Ingredients
- Black Sesame Steamed Buns Recipe
- Sweet Chinese Black Sesame Dessert Soup (芝麻糊)
Why Use Glutinous Rice Flour?
Sesame balls boast a delightful soft, sticky, and chewy texture, reminiscent of mochi varieties like Mango Mochi, Peanut Mochi, and Strawberry Mochi.
However, what distinguishes sesame balls is their additional step of deep-frying, resulting in a satisfyingly crunchy outer layer.
The only ingredient that can give its distinct chewy texture is glutinous rice flour.
Glutinous rice flour, also called sweet rice flour or sticky rice flour, is made from milled glutinous rice. It is called “glutinous” mainly because of its glue-like sticky texture and not because it contains gluten.
So, you can be assured that glutinous rice flour is gluten-free!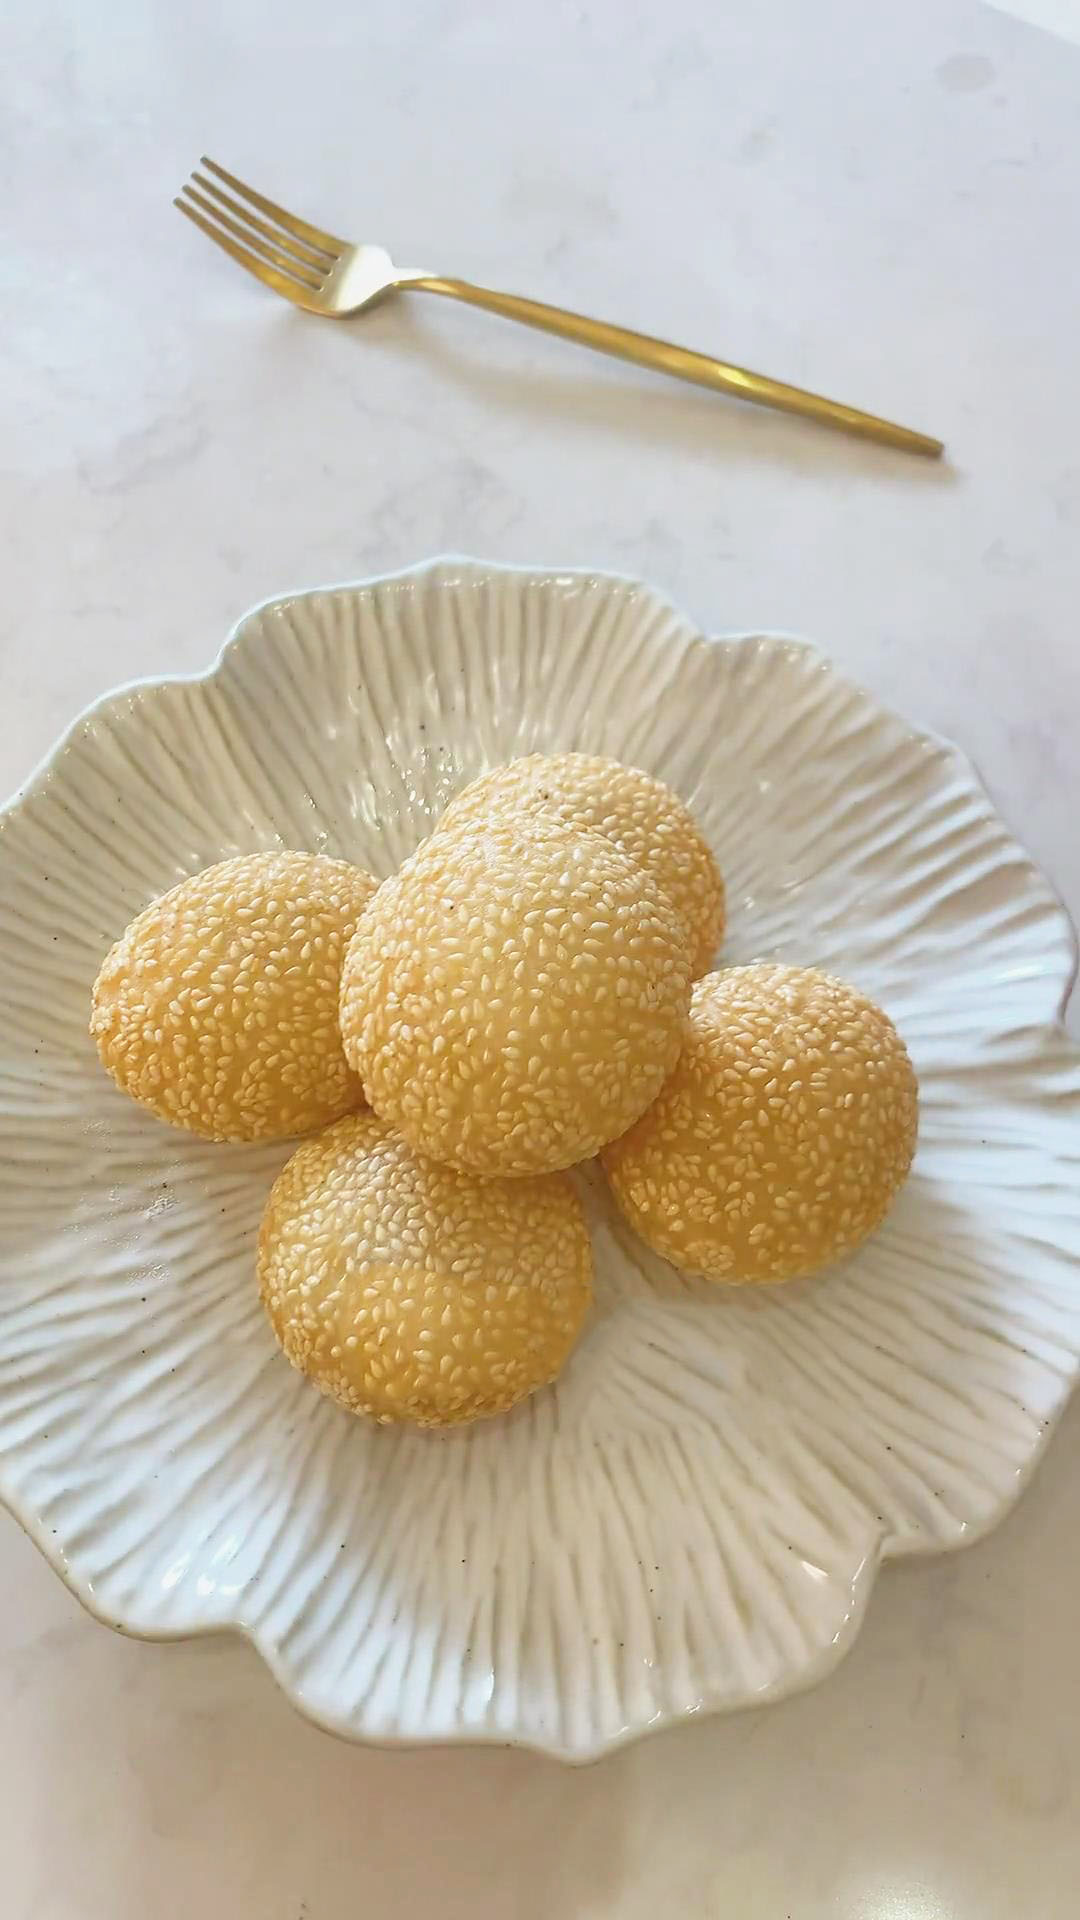
Don’t confuse this with rice flour though since it is a completely different type of flour made from long or medium-grain white rice, such as japonica, sinandomeng, angelica, or indica.
It will not give the sticky, chewy texture you are going for, which can only be achieved with glutinous rice flour.
Moreover, other types of flour like wheat flour, cornstarch, or all-purpose flour will also not make the same texture as glutinous rice flour.
Thus, make sure to have glutinous rice flour ready, which you can easily get in Asian grocery stores or online stores like Amazon.
It will definitely be a good purchase since you can use it in many Chinese and Asian treats. Here are some recipes to try to use your extra glutinous rice flour:
- Nian Gao (Chinese New Year Rice Cake)
- Tang Yuan (Black Sesame Glutinous Rice Balls)
- Homemade Ham Sui Gok 咸水角 (Fried Glutinous Rice Dumplings)
- Boba Milk Tea Mochi
- Matcha Mochi (Green Tea Cheese Ice Cream Filling)
Which Filling Is The Best For Sesame Balls?
The answer to this depends on your taste and preference. Basically, you can fill the balls with your chosen flavors or leave them plain without a filling.
The fillings can be bought in Asian grocery stores, in the international section of local grocery stores, or in online stores like Amazon.
If you have extra time on your hands, you can also make it yourself by following my suggested filling recipes below.
For this recipe, I used lotus seed paste made with peeled lotus seeds, corn oil, maltose, and white sugar. The filling is prepared by rolling it into a ball and placing it in the center of the dough for wrapping.
To make a plain sesame ball, simply omit the filling and fry the sesame balls without it. For more variety of flavors, use these fillings as well:
- Yam paste
- Purple sweet potato paste
- Black sesame paste
- Taro paste
- Red bean paste
- Matcha bean paste
- Mung bean paste
Expert Tips For The Perfect Sesame Ball
I have mastered the art of making sesame balls after cooking them several times, too many to count.
Throughout many trials and errors, I discovered several do’s and don’ts that would be helpful to create a successful sesame ball.
These expert tips I have gathered are going to be incredibly helpful, especially if you are a newbie in making sesame balls. 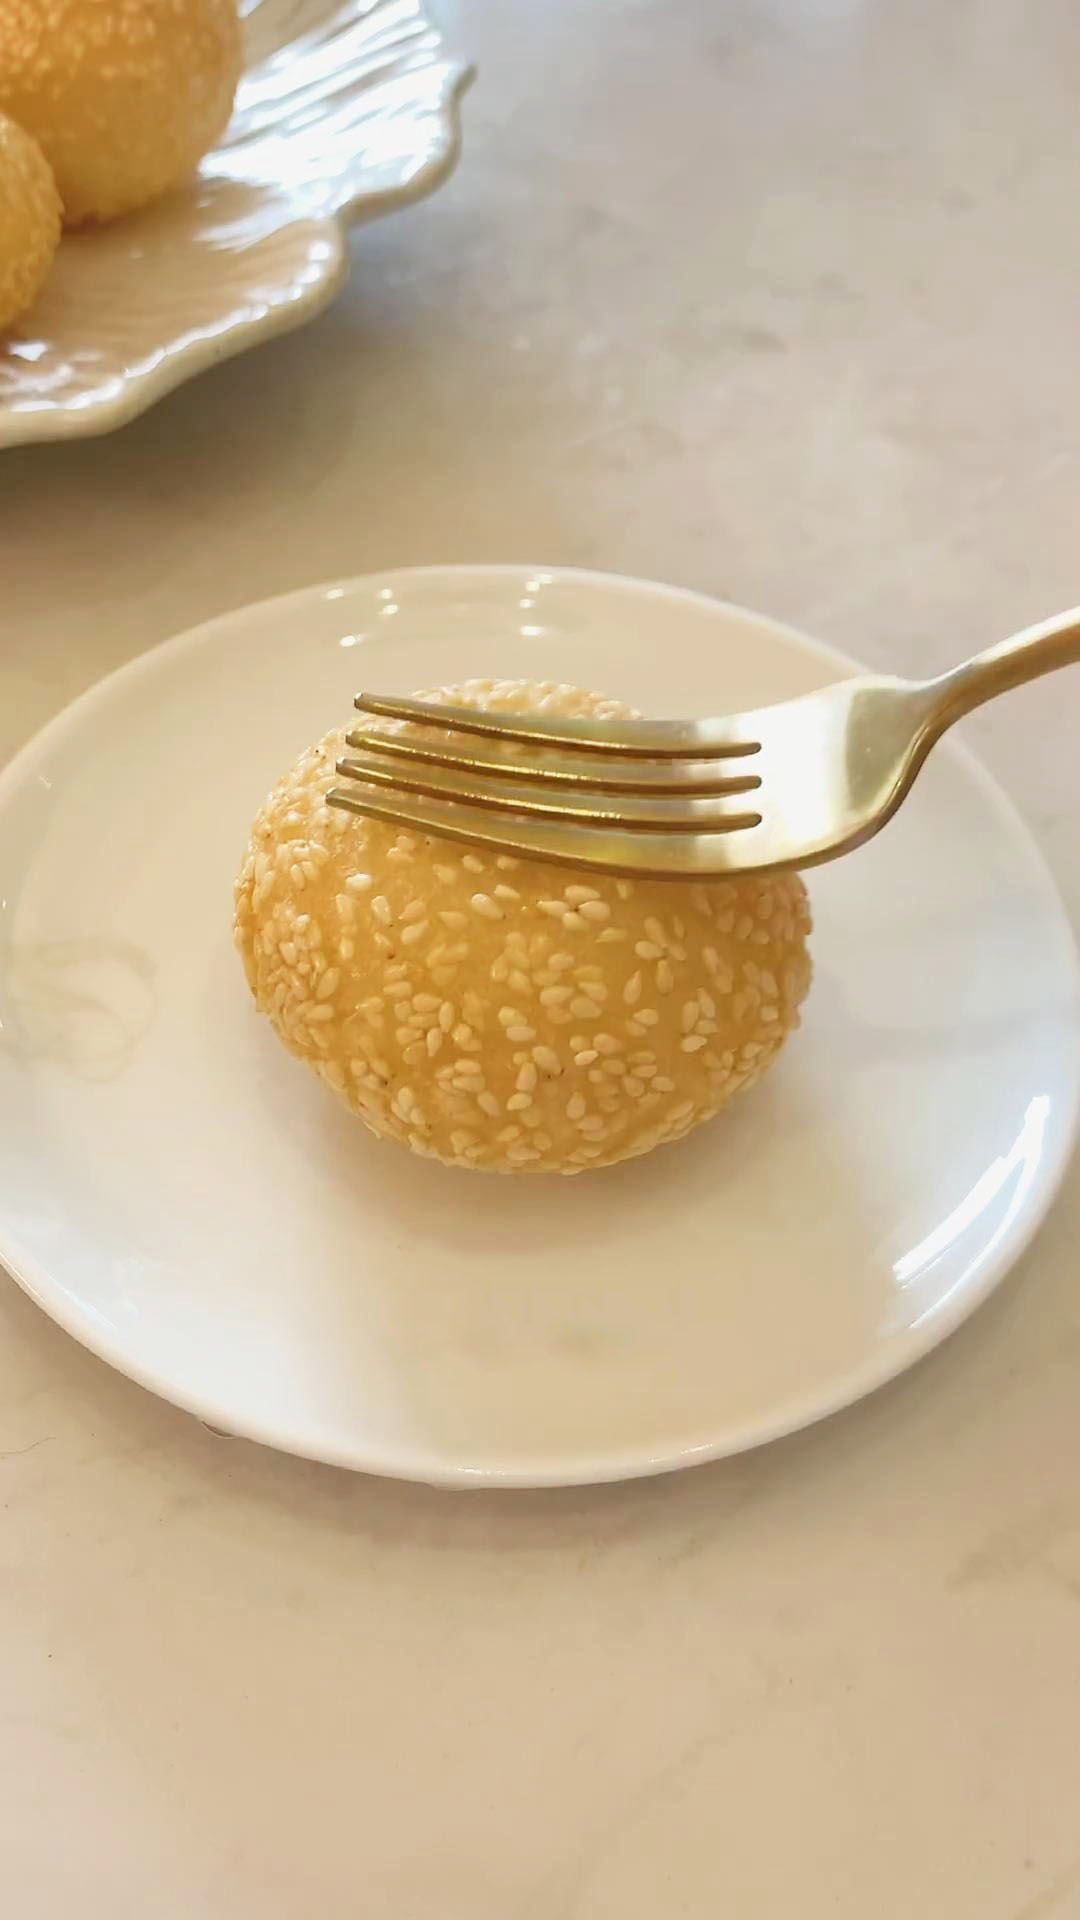
Don’t get me wrong, the steps are super easy to do! It’s just that there are a few things that can lead to sesame balls popping or not having the right sticky texture. The results you are going for should be round, chewy, crunchy, and definitely not popped or deformed.
In a nutshell, here are several reasons why a sesame ball may pop:
- The dough is not kneaded properly or dried out already for deep-frying.
- The dough did not use boiling water or contain little sugar since sugar helps the flour expand.
- The balls were not sealed properly.
- The dough’s outer layer is too thin with weak areas.
- The sesame balls are deep-fried too fast or unevenly.
- The sesame balls are deep-fried using incorrect oil temperature.
To prevent these things from happening, follow these expert tips and make the perfect sesame ball:
How to get the right dough texture:
- The dough should be soft and pliable and does not stick to your hand or surface. If it is too soft or sticky, gradually add flour. If it is too stiff or dry, gradually add water. Do the adjustments in small amounts until you get the right dough texture.
- Sometimes, the texture is affected when the measurements are incorrect. I recommend using a kitchen weighing scale to get accurate measurements of the dough ingredients. It is best to measure in weight and not in cup measurements.
- The dough is mixed with boiled water and sugar. I recommend using white sugar to have the whitish-light color of a typical sesame ball. If using brown sugar, coconut sugar, cane sugar, or muscovado, it may add a bit of brown to the balls. The key to getting a stretchy consistency is adding freshly boiled water to the glutinous rice flour. If you use just warm, room temperature, or cold water, the dough will not become stretchy. Keep in mind you need this stretchy quality during the deep-frying process since the balls will expand and become bigger sesame balls.
- The dough is kneaded with vegetable oil for extra moisture and fluffiness. You can use corn oil, peanut oil, or soybean oil.
- When you are done kneading the dough, make sure to cover it with a plate or plastic wrap to preserve its moisture. Otherwise, the dough becomes dry and weak for deep-frying. You should do this as you are making the filling balls.
- Do not stop kneading or rush this step until you have a smooth pliable dough. Remember, the more you knead the dough, the smoother it becomes. Dust the surface with flour if the dough keeps sticking to the surface while kneading.
- I let the dough rest for about 30 minutes as I made the filling balls. Why let the dough rest? This step is important to let the dough effectively absorb the water and become sufficiently hydrated. After resting the dough, shaping the sesame balls becomes a lot easier. It also helps retain its shape so you can have uniform round balls.
The proper way to form the sesame balls:
- The dough and filling should be divided into equal pieces. Making equal pieces is important so that the sesame balls are cooked consistently during the deep-frying process. That is why it helps to have a kitchen weighing scale to ensure equal measurements.
- The dough balls should be bigger than the filling. In this recipe, each dough ball weighs about 50g. So, each filling ball should be less than 50g, about half the size. If the filling balls are too big for the dough, the sesame ball will be too thin and weak, causing it to crumble or explode during the deep-frying process.
- When assembling the dough and filling, make sure the outer layer does not have patches and thin, weak areas. If you notice a thinned-out area, you can thicken it by adding a bit of dough and dabbing a small amount of water to let the dough stay in place.
- Seal and smoothen the assembled sesame balls to make sure the filling will not leak and the dough will not open during deep-frying.
- It may take time before the sesame balls are deep-fried. If that is the case, make sure the sesame balls are covered with a plastic wrap to preserve their moisture. Otherwise, the assembled sesame balls may become dry and weak for deep-frying.
The correct deep-frying technique
- Initially, the sesame balls are not deep-fried at high temperatures. For this recipe, you will utilize a slow frying technique. First, the sesame balls are deep-fried in oil at 120 degrees Celsius. After adding the sesame balls, the temperature will lower, allowing the balls to heat up slowly and expand a bit for about 13 minutes. After letting the balls crisp up and enlarge, the heat is increased to medium-high and the balls are further cooked for an additional 3 to 5 minutes. Increasing the heat in the end gives you a crunchier and stronger outer layer. If you do not follow the slow frying technique, the sesame balls will expand too quickly at high temperatures and pop.
- Use a kitchen thermometer to check if the oil temperature is correct. In this way, you won’t cook the sesame balls at too low or too high temperatures.
- Use oil with a high smoke point. Deep-frying needs oil with a high smoke point that is more heat stable and reduces the amount of oil oxidized. Examples of oils with a high smoke point are avocado, peanut, canola, and corn oil. For a healthier option, use olive, avocado, sesame, or safflower oil. For a more neutral taste, use peanut, soybean, or vegetable oil.
- First, the sesame balls sink to the bottom of the pan. Afterward, the balls start to float to the top. While deep-frying the sesame balls, gently press them down to fully submerge in the oil to ensure even cooking on all sides. It is important to continuously press and move the balls around to prevent them from sticking to the pot as well.
- Check the shape of the sesame balls. Make sure they are still round and do not become egg-shaped or irregular. If you see irregular-shaped balls, remove them right away from the pan since these tend to pop.
- If one side of the ball is white or not golden brown, turn this side over to the oil to cook that side. If not, it may tear and pop.
How to coat the balls with sesame seeds:
- Traditionally, sesame balls are coated with white sesame seeds. However, you can also use black sesame seeds or a combination of black and white. Sesame seeds add a nutty taste and bits of crunch. Keep in mind black sesame seeds have a more potent taste than white.
- Ideally, the sesame seeds should not fall off and must be firmly attached to the sesame balls. The technique I used to make sure the sesame seeds do not fall off is rolling the balls in water mixed with glutinous rice flour. Afterward, I rolled the balls in white sesame seeds and pressed the seeds firmly.
Ingredients And Kitchenware Needed
Here are my recommended ingredients and kitchenware:
Kitchenware
- Pot (for boiling the water and sugar)
- 3 mixing bowls (for mixing the dough, coating with white sesame seeds, and rolling in water and glutinous rice flour mixture)
- Chopsticks (for mixing)
- Plate cover or plastic wrap (to cover the dough while resting)
- Dough cutter (to divide the dough and filling)
- Pan (for deep-frying)
- Slotted spoon or strainer spatula
Ingredients
- 120 grams water
- 50 grams white sugar
- 170 grams glutinous rice flour
- 5 tbsp Vegetable oil
- Lotus seed filling (or your choice of filling)
- White sesame seeds
- Water and glutinous rice flour mixture
- Oil for deep-frying
Detailed Steps To Make Sesame Balls
Follow my step-by-step tutorial video on Instagram or TikTok to learn more. In this recipe, you will make the dough, assemble it with the filling and white sesame seeds, and deep-fry them until golden brown and crispy.
When you are done making sesame balls, remember to snap a photo and tag me @kitchenmisadventures to share your creations!
- In a pot, combine water and sugar, cooking until the sugar dissolves completely. Bring the water to a boil, then turn off the heat. This water will be used in the next step.
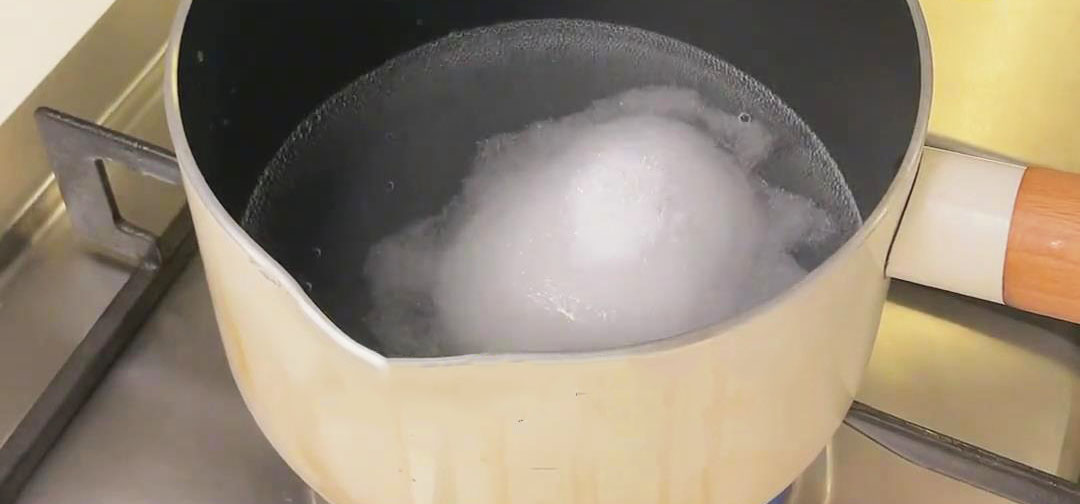
- Place 100g of glutinous rice flour in a mixing bowl. Then, slowly pour the boiled sugar water, stirring continuously using a stirrer or chopsticks. The mixture becomes pasty and creamy. Make sure the water is freshly boiled when you do this to allow the glutinous rice flour to become stretchy.
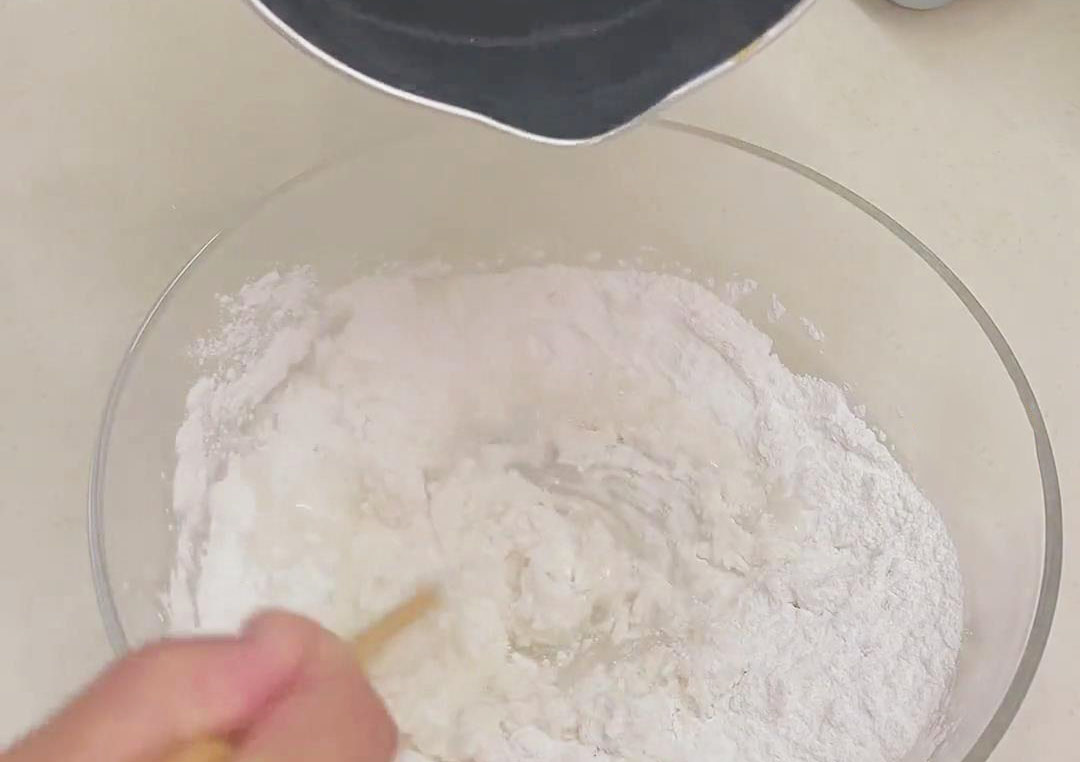
- Afterward, add 70g of glutinous rice flour.
- Mix in half a tablespoon of vegetable oil to form a dough. Knead until you form a smooth, pliable dough.
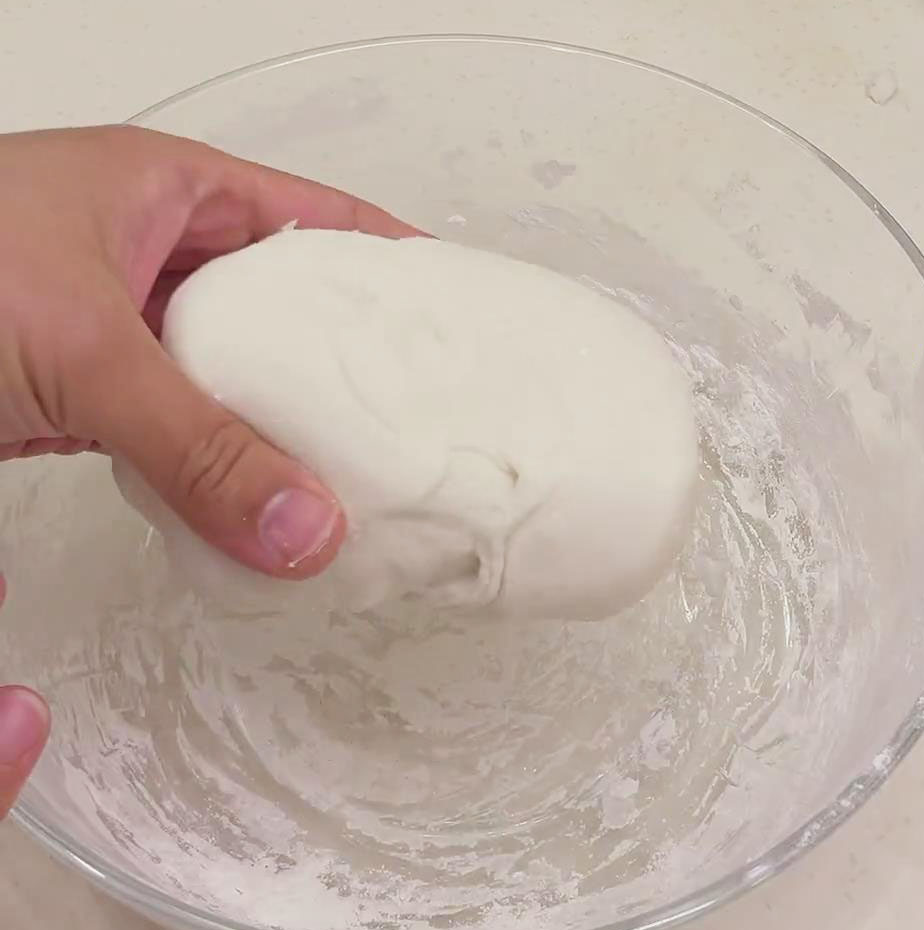
- Cover the dough with a plate or plastic wrap and let it rest for half an hour.
- While letting the dough rest, prepare the filling by shaping it into round balls. Make sure the size is smaller than the dough balls. It will be a lot easier to form balls when the filling is refrigerated first.
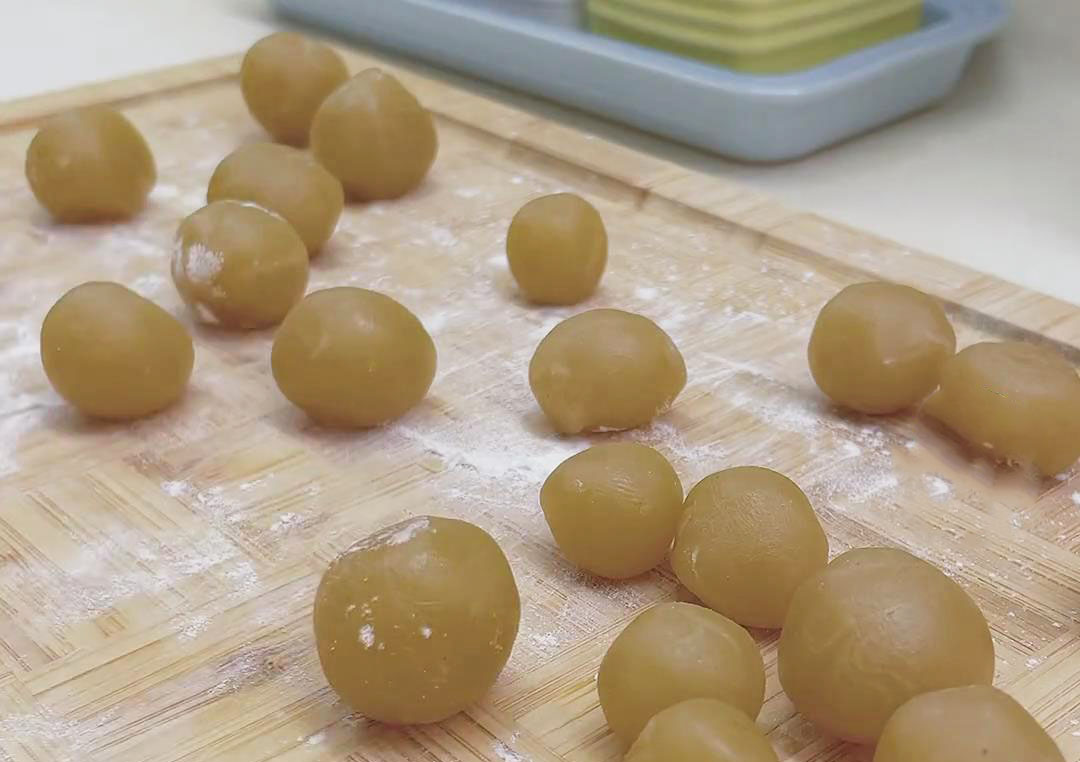
- After 30 minutes of resting the dough, roll it into a log and divide it into 5 small portions, about 50g each. Shape them into balls.
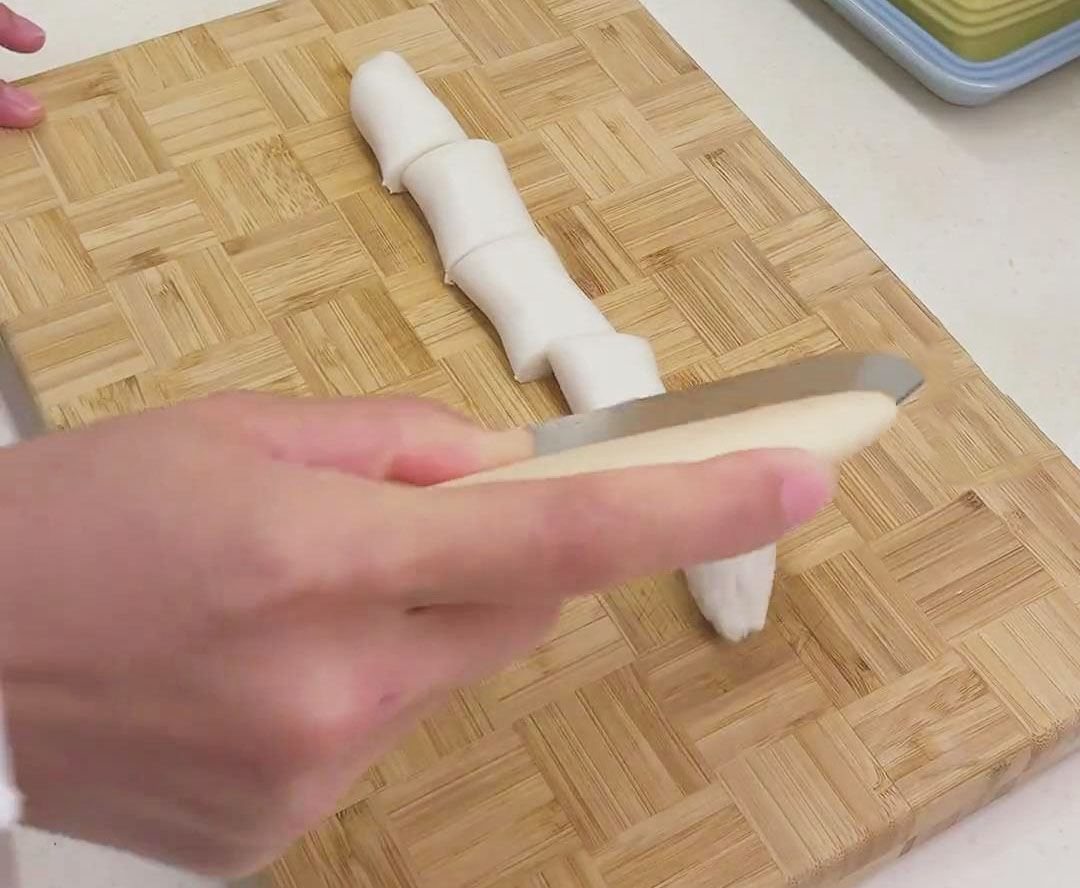
- Wrapping the sesame ball follows a process similar to how I assemble Tang Yuan. Press the ball to form a crater in the center, where you will place the filling. Add the filling, seal the top, and smoothen out the ball. This is the step where you should also check for thin or weak areas. If there are, thicken it with a patch of dough.
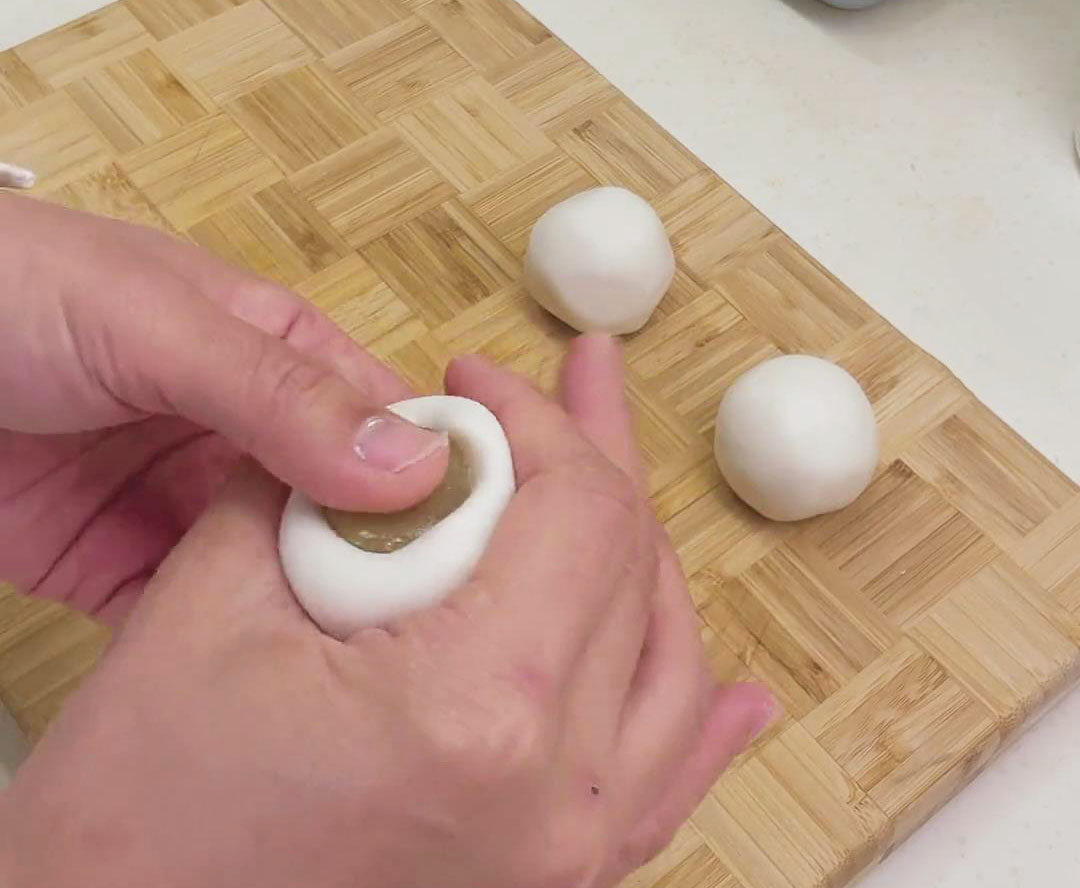
- Make a mixture of water and glutinous rice flour. Coat the sesame ball by rolling it in the mixture.
- Roll the ball in the sesame seeds, then press firmly with your hand. Make sure the ball is fully covered in seeds without empty spots.
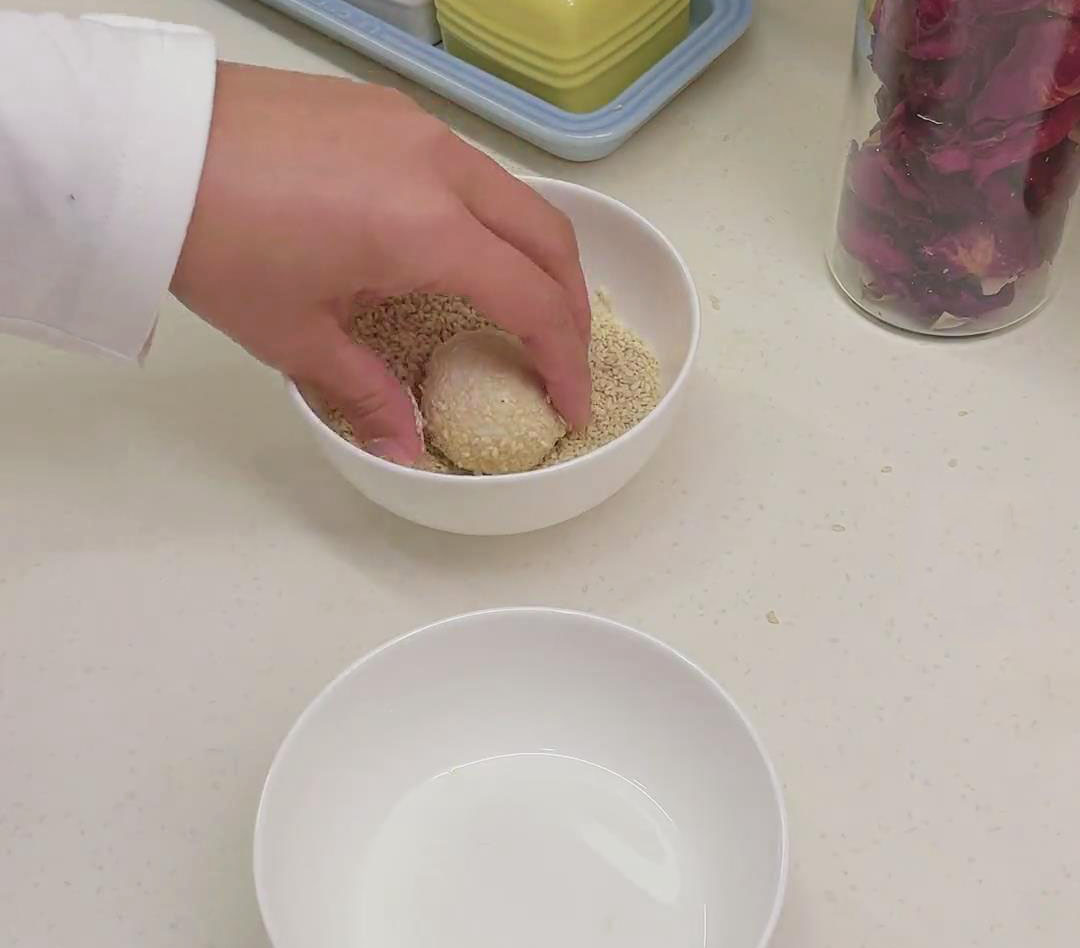
- Heat oil in a pan to around 120 degrees Celsius. The oil should be deep enough to deep-fry the balls. You can use a kitchen thermometer to check if the oil is ready.
- Carefully place the sesame balls in the oil and fry for about 13 minutes, ensuring they are fully submerged in the oil. Continue moving the balls around in this step since the balls will first sink at the bottom of the pot.
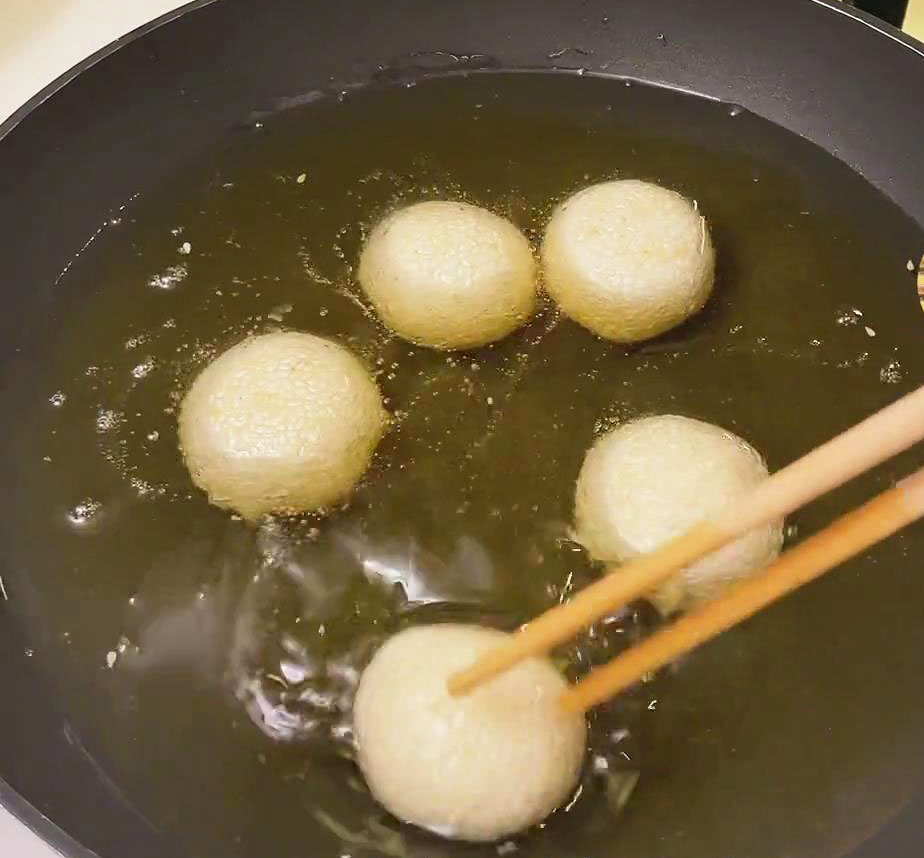
- When the sesame balls float to the top, gently press them down to fully submerge in oil and ensure even frying.
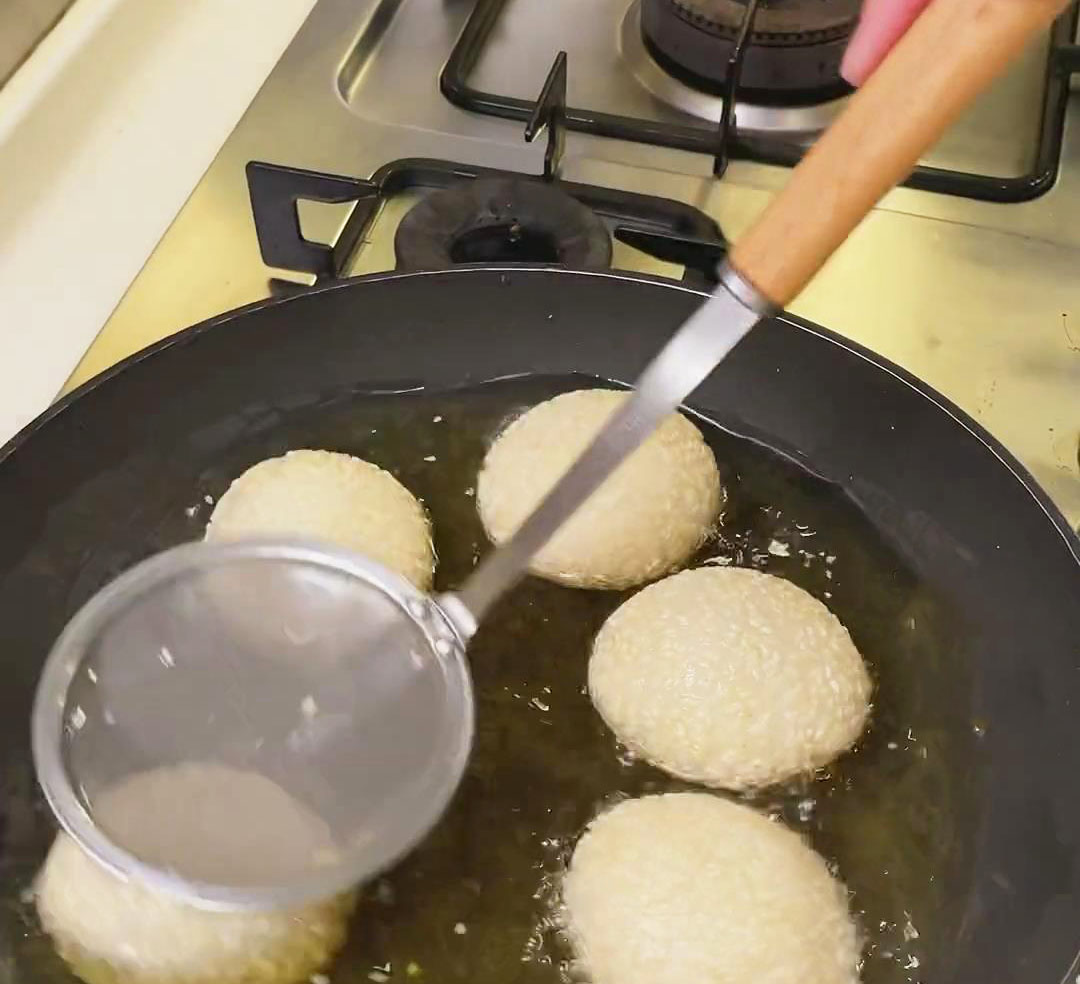
- After 13 minutes, increase the heat to medium-high and fry for an additional 3 to 5 minutes until the sesame balls are golden brown and evenly colored.
- Remove the sesame balls and let the oil drain. Let it cool before serving. Enjoy these chewy balls with tea or a refreshing drink like Taro Bubble Milk Tea or Hand-Brewed Lychee Tea With Lemon.
Sesame Balls Recipe (Authentic Deep-Fried Jiandui)
Ingredients
- 120 grams water
- 50 grams white sugar
- 170 grams glutinous rice flour
- 5 tbsp Vegetable oil
- Lotus seed filling or your choice of filling
- White sesame seeds
- Water and glutinous rice flour mixture
- Oil for deep-frying
Instructions
- In a pot, combine water and sugar, cooking until the sugar dissolves completely. Bring the water to a boil, then turn off the heat. This water will be used in the next step.
- Place 100g of glutinous rice flour in a mixing bowl. Then, slowly pour the boiled sugar water, stirring continuously using a stirrer or chopsticks. The mixture becomes pasty and creamy. Make sure the water is freshly boiled when you do this to allow the glutinous rice flour to become stretchy.
- Afterward, add 70g of glutinous rice flour.
- Mix in half a tablespoon of vegetable oil to form a dough. Knead until you form a smooth, pliable dough.
- Cover the dough with a plate or plastic wrap and let it rest for half an hour.
- While letting the dough rest, prepare the filling by shaping it into round balls. Make sure the size is smaller than the dough balls. It will be a lot easier to form balls when the filling is refrigerated first.
- After 30 minutes of resting the dough, roll it into a log and divide it into 5 small portions, about 50g each. Shape them into balls.
- Press the ball to form a crater in the center, where you will place the filling. Add the filling, seal the top, and smoothen out the ball. This is the step where you should also check for thin or weak areas. If there are, thicken it with a patch of dough.
- Make a mixture of water and glutinous rice flour. Coat the sesame ball by rolling it in the mixture.
- Roll the ball in the sesame seeds, then press firmly with your hand. Make sure the ball is fully covered in seeds without empty spots.
- Heat oil in a pan to around 120 degrees Celsius. The oil should be deep enough to deep-fry the balls. You can use a kitchen thermometer to check if the oil is ready.
- Carefully place the sesame balls in the oil and fry for about 13 minutes, ensuring they are fully submerged in the oil. Continue moving the balls around in this step since the balls will first sink at the bottom of the pot.
- When the sesame balls float to the top, gently press them down to fully submerge in oil and ensure even frying.
- After 13 minutes, increase the heat to medium-high and fry for an additional 3 to 5 minutes until the sesame balls are golden brown and evenly colored.
- Remove the sesame balls and let the oil drain. Let it cool before serving.

Thank you for your detailed recipe and instructions. I was wondering, though if I can roll them up ahead of time and freeze them? Or roll them the day before and then fry them the day of the party?
Hi Helen,
Yes, you can definitely prepare Sesame Balls ahead of time and freeze them for later use.
It’s similar to how I freeze dumplings. You can find the article here for reference.
https://kitchenmisadventures.com/how-to-store-and-freeze-dumplings/
Place the Sesame Balls on a baking sheet lined with parchment paper, making sure they are not touching each other.
Place the baking sheet in the freezer and allow the Sesame Balls to freeze until solid, which usually takes about 1-2 hours.
Once frozen, transfer the Sesame Balls into a freezer-safe bag or container, making sure to remove as much air as possible before sealing.
Label the bag or container with the date and store them in the freezer for up to 1 month.
When you’re ready to fry the Sesame Balls, there’s no need to thaw them. Simply heat the oil to the appropriate temperature and fry the frozen Sesame Balls directly from the freezer. Be sure to fry them in batches, so as not to overcrowd the pan.
Alternatively, if you prefer to roll them the day before and fry them the day of the party, you can also do that. Just make sure to keep them covered or refrigerated to prevent them from drying out before frying.