This post may contain affiliate links. Please read our disclosure policy.
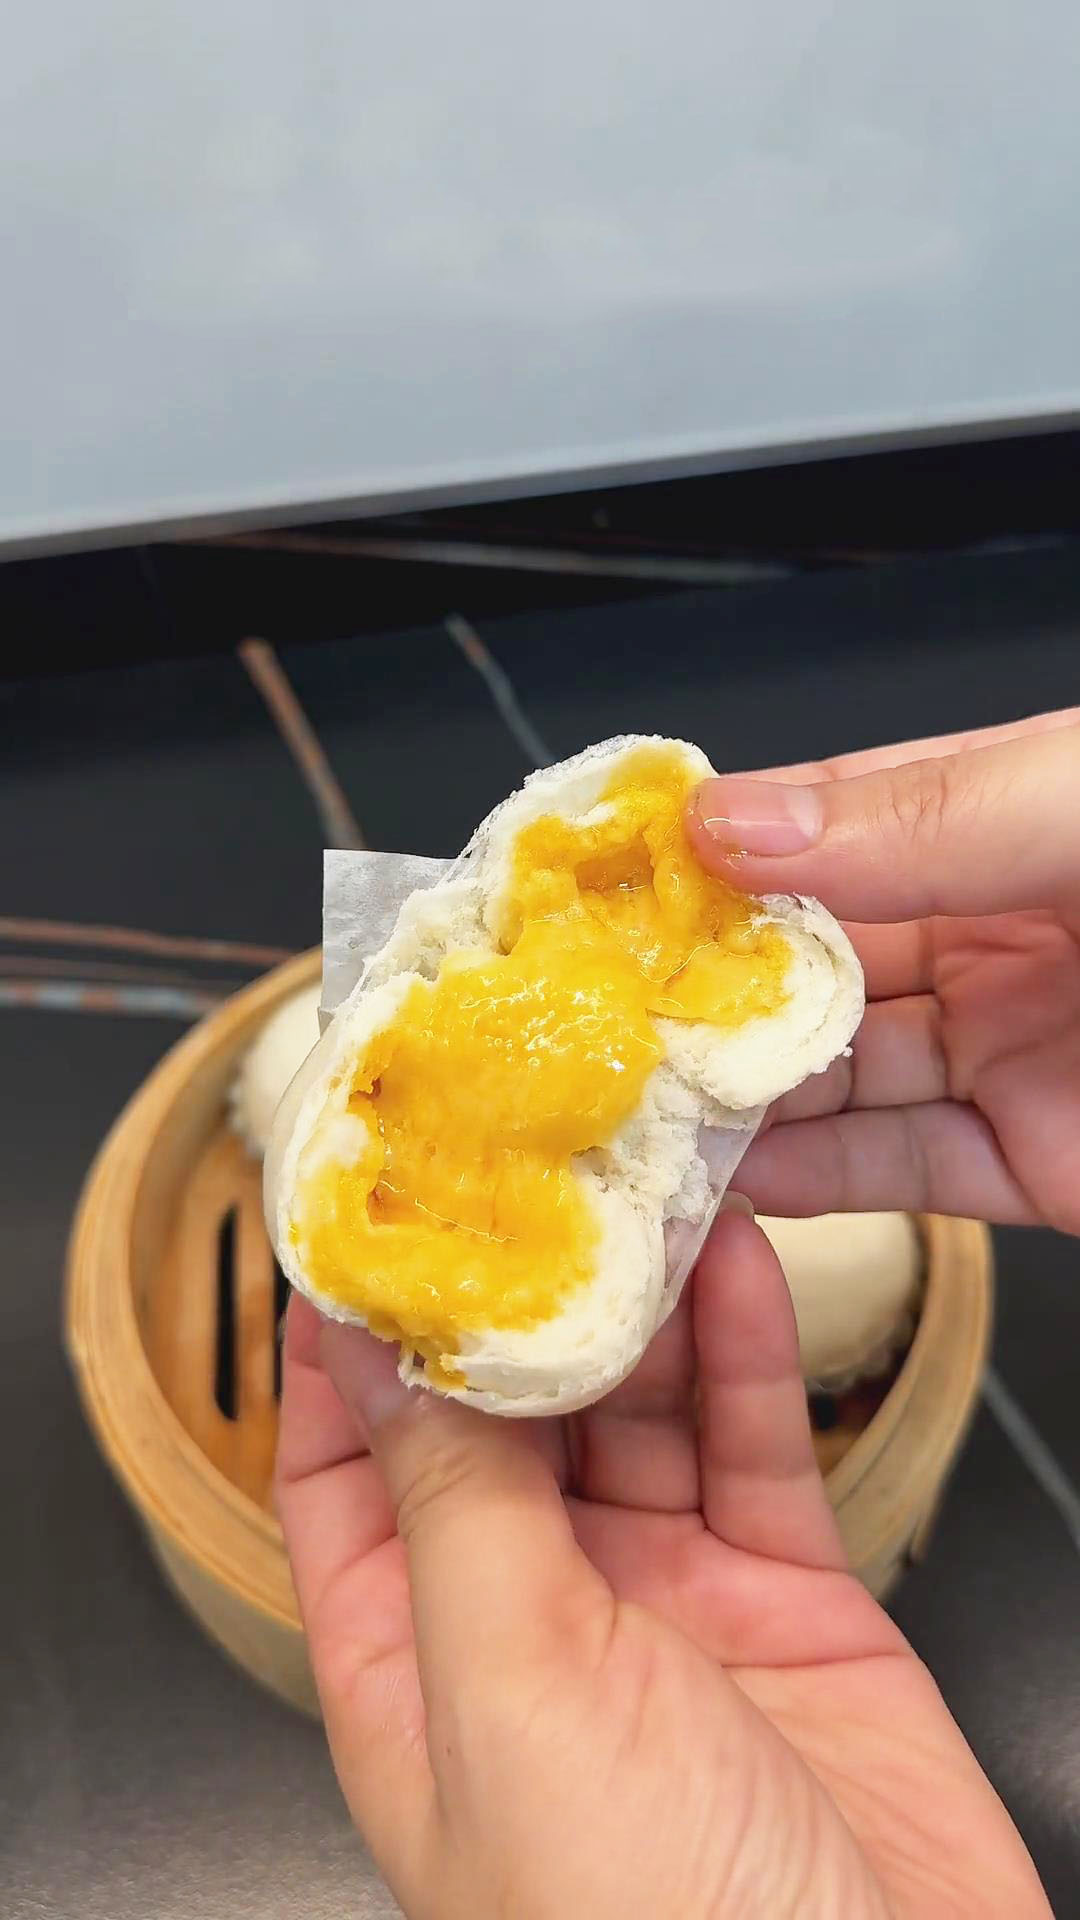
Salted egg yolk buns are creamy, soft, and melty. It is a beloved dim sum dish with a salty and milky filling made of salted egg yolks. This in-depth guide teaches you how to make these buns properly at home with my expert tips and tricks.
What Are Salted Egg Yolk Buns?
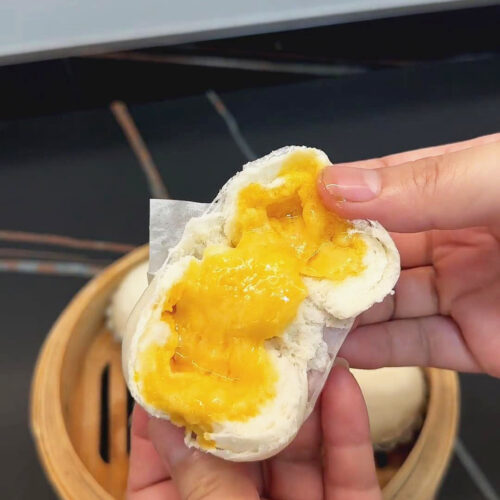
Salted egg yolk buns are called liu sha bao or sometimes golden lava buns. In literal translation, liu sha actually means quicksand. It takes its name lava or quicksand because of its oozing filling that melts in your mouth.
Keep in mind that liu sha bao is entirely different from another egg bun, Egg Custard Bun (Nai Wong Bao).
For liu sha bao, the filling is a mix of salted egg yolks, cornstarch, milk powder, gelatin, lard, butter, and white sugar.
Making the bun dough for liu sha bao is just like my other bun recipes like beef bao bun, char siu bao bun, or chicken bao bun.
To make the dough, I combined plain flour, sugar, water, lard, and yeast powder. In a nutshell, the recipe steps call for mixing, kneading, shaping, proofing, and steaming. Serve salted egg yolk buns as a light snack or creamy dessert and pair it with a cup of hot coffee or tea.
Got extra bun dough left? Use it to make these bun recipes:
- Piggy Buns With Custard Filling
- Red Bean Paste Buns
- Black Sesame Steamed Buns
- Chinese Longevity Peach Buns (Steamed Shoutao Bao)
- Sweet & Fluffy Steamed Taro Bun
- Purple Sweet Potato Bun
- Egg Custard Buns (Nai Wong Bao)
- Sugar Bun (Chinese Sweet Buns)
- Chicken Bao Buns
- Beef Bao Buns
Ingredient Alternatives And Suggestions
Dough Ingredients
- All-Purpose Flour: Use plain regular flour or all-purpose flour to give the dough a nice white color and soft texture. Avoid special flour types like whole wheat flour, rice flour, or glutinous rice flour since these will result in a different texture not ideal for Chinese buns.
- Sugar: Sugar balances out the slightly bitter taste of flour. Moreover, it helps aid in the fermentation process with the yeast since yeast feeds on sugar, making it faster and more efficient. Use granulated sugar, white sugar, coconut sugar, or brown sugar.
- Warm Water: I recommend warm water to help you achieve a smoother dough and allow the dough to rise quickly. Warm water should be at a temperature of about 110°F and below. Not only is warm water needed for a smoother dough, but it is also the required temperature for the yeast. Remember, the yeast will die if it is added to hot water with a temperature of 120°F or higher. Once the yeast is killed, it will not activate the fermentation process. If the fermentation process does not activate, the dough will not rise and give you a flat bun.
- Lard: I added lard for a richer taste and texture. You can learn how to make lard from my recipe. Alternatively, you can substitute it with vegetable shortening, melted butter, or vegetable oil.
- Yeast: The most crucial ingredient in making the buns rise and airy is the activated yeast. When the yeast feeds on sugar, it converts the sugar into carbon dioxide and ethanol, the two elements that are essential in making the bun rise. Yeast can be instant yeast or active dry yeast. If you are using instant or fast-rising yeast, you can mix it directly with the flour and warm water mixture. For active dry yeast, you have to mix it with warm water first before adding it to the flour mixture.
Salted Egg Yolk Filling
- Egg yolks: Salted egg yolks are typically umami and buttery. Use salted duck egg yolks which can be bought in Asian supermarkets. You can also make your own quick version of salted egg yolks at home by rubbing the egg yolks with salt and storing them in the fridge for about 2 days or more. The longer it soaks in salt, the saltier it gets. Afterward, rinse off the salt with water.
- Liquor spray: I sprayed liquor onto the egg yolks before cooking it in the air-fryer or microwave. You can use dark liquor like rum or whiskey. The liquor spray serves as a seasoning for a kick of flavor and aroma.
- Cornstarch: The egg yolks are blended with cornstarch for a thicker and creamier filling. You can replace cornstarch with tapioca starch, potato starch, or more all-purpose flour. Without cornstarch, the filling might become too runny and wet. You want to make it look like lava oozing out of the bun on your first bite.
- Milk powder: Milk powder is also blended with the salted egg yolk for a touch of rich milky flavor. You can use regular milk powder, soy milk powder, cashew powder, or coconut milk powder.
- Gelatin + warm water: The gelatin sheets are prepared by combining with warm water until soft. Gelatin helps give the filling a jelly-like texture. The best alternative to gelatin is agar agar powder or flakes derived from red algae. Keep in mind that 1 tsp of agar agar powder is equivalent to 1 tbsp of agar flakes. Remember, the more agar agar or gelatin you add to the filling, the firmer it becomes.
- Lard: Melt the lard before adding it to the filling to make it easier to mix. This adds extra moisture to the filling and a rich taste. This can be omitted or substituted with vegetable shortening, melted butter, coconut oil, or vegetable oil.
- Butter: In addition to lard, I also added melted butter for extra moisture and as a flavor enhancer. I recommend using unsalted butter instead of salted butter for a neutral taste. You can also swap this with vegetable shortening, dairy-free butter, coconut oil, cream cheese, yogurt, or nut butter.
- White sugar: To make it a bit sweet and balance the salty taste of the egg yolk, I mixed in white sugar. You can also use powdered sugar, granulated sugar, brown sugar, or coconut sugar. If using brown-colored sugars, this may affect the bright yellow color of the filling.
Expert Tips For A Successful Salted Egg Yolk Bun
Have you never made buns before? This part is for you if you answered no. If you have experience making buns, why not read this part too to learn more about personal tips and suggestions? From kneading to proofing to steaming, I share helpful tips and tricks for making the dough and filling.
- It helps to have a kitchen weighing scale and thermometer for accurate measurements. Making the perfect bun texture not only depends on how well it is kneaded, but how accurate the measurements are. I don’t like to rely on cup or spoon measurements since different types or brands may produce different weights, so it is always best to use a kitchen weighing scale to measure. Since you don’t want to kill the yeast with hot water, I recommend having a kitchen thermometer to be sure of the water’s temperature. By using a kitchen thermometer, you will have assurance that the water’s temperature is safe for the yeast.
- Adjust the dough‘s consistency by adding flour or water to achieve a smooth non-sticky dough.Sometimes, you may not achieve the ideal dough consistency since it varies on the type of ingredients used. You want to create a smooth pliable dough that is non-sticky. It shouldn’t be too soft or too stiff. Moreover, it should not stick to your hands. In case you need to adjust the dough’s consistency, gradually add small amounts of flour or water until you get the desired consistency.
- Test the salted egg yolk filling by melting it: You want to make sure that the filling does not become too runny inside the bun after steaming. The best way to know how the filling will look and taste after steaming is by doing a melt test. Take a small portion of the filling and allow it to melt in a heat-resistant bowl in a pot of boiling water. Keep stirring the filling until it melts. It should melt into a thick and creamy filling and not a watery one. In this way, you can decide if you need to add more melted butter or cornstarch before assembling it with the dough.
- Do not stop kneading until you have a smooth dough:Kneading may be the toughest step in the recipe since it requires manual labor. Please be patient with this step since the more you knead the dough, the smoother it becomes. You will be kneading the dough at least 2 times. If the dough keeps sticking to the surface as you knead, you can dust the surface with a bit of flour to prevent sticking.
- Let the buns rest before steaming.After shaping the dough and filling into a small ball, let it rest and wait for it to increase its size before steaming. Do not rush or skip this step.
- Buns undergo a proofing process, which allows them to increase their size. It should become about 1.5 to 2 times larger than the original size. How long it takes depends on the temperature of the environment. Generally, it may take 30 minutes to an hour or more for the size to become larger.
- As mentioned, do not rush this step but do not also overdo it. Over-proofing will allow too much air to enter which weakens the dough. On the other hand, under-poofing will not complete the activation process and cause it to remain flat.
- Proofing time depends on the environment. Basically, the warmer the environment, the faster the proofing process. On the other hand, the colder the environment, the slower the proofing process is. For cold days, you can make the environment warmer for the buns by placing the buns in an oven or microwave with a boiled cup of water inside.
- In a nutshell, check the size, scent, and texture of a properly proofed dough. You can tell that the buns have been properly proofed by how they look and feel since proofing times vary. Here are a few things to keep in mind:
- Size: It should increase and rise to about5 or 2 times bigger than its size.
- Aroma: It produces a natural wheat smell without a funny smell.
- Feel: It is smooth, bouncy, and springy. It should spring back to its round shape after lightly pressing the dough.
Ingredients And Kitchen Tools
Here’s a detailed list of recommended kitchenware to make the buns.
- Air fryer or microwave (to cook the salted egg yolks)
- Blender or food processor (to blend the salted egg yolks)
- Mixing bowls (to mix the filling and for kneading)
- Dough cutter or knife (to cut the dough into small portions)
- Rolling pin (to flatten the dough wrapper)
- Parchment paper
- Cupcake paper cups
- Steamer (If you don’t have a steamer, you can still steam buns without a steamer in 5 ways: pan with steamer rack, microwave, pan with sieve, rice cooker, and instant pot.)
As for the ingredients, here’s what you need for the filling and dough:
Filling:
- 6 Salted egg yolks (sprayed with your choice of liquor)
- 20g cornstarch
- 20g milk powder
- 5g gelatin sheets
- 60g warm water
- 40g lard (melted)
- 40g butter (melted)
- 40g white sugar
Dough:
- 250g plain flour
- 10g white sugar
- 125g water
- 5g lard
- 3g yeast powder
How To Make Salted Egg Yolk Buns
Here are the step-by-step instructions on how to make salted egg yolk buns. Generally, the steps call for making the filling, kneading the dough, assembling them both, and steaming. Get a better idea of how to do the steps by watching my Instagram or TikTok tutorial video.
Don’t forget to share your creations by tagging @kitchemisadventures! Leave a comment below for your thoughts and suggestions. Follow these steps to make salted egg yolk buns:
Make The Filling
- Spray the salted egg yolks with liquor.

- Place them on a heat-resistant plate and cook in the air fryer or microwave for 10 minutes. Afterward, the yolk becomes semi-solid and creamy like the center of a hard-boiled egg.
- Use a food processor to blend the egg yolks with cornstarch and milk powder. Transfer to a bowl and set aside. This should give you a sandy or grainy blended texture.

- In a bowl of water, soak the gelatin sheets until soft.
- Then, stir in warm water with the soft gelatin until well combined.

- Pour the gelatin mixture onto the egg yolk mixture and continue stirring until well combined. This should create a creamy and thick mixture.

- Add melted lard and melted butter and stir thoroughly.


- Add white sugar. Mix well and refrigerate the filling for an hour. After 1 hour, the creamy mixture should firm up.
- After 1 hour, take out the filling and shape it into small balls, about 20g each.

Knead The Dough
- Combine plain flour, sugar, and water. Mix until it forms clumps.

- Add lard and knead until it becomes a smooth dough. This should take approximately five to ten minutes.


- Dissolve the yeast with a small amount of water.

- Mix the yeast mixture with the dough.

- Knead again until the yeast is fully incorporated into the dough.
- Roll the dough into a log and divide it into 30g portions using a dough cutter or knife.

- Flatten each portion into a small circular wrapper with a thicker center and thinner edges using a rolling pin.

Assemble And Steam The Buns
- Take a dough wrapper and place the filling in the center.

- Seal the bun by pinching the edges together.

- Place the buns on parchment paper.
- Let the buns rise until they double in size.
- Place the buns inside a cupcake paper cup. This can be optional.
- Transfer the buns to your steaming equipment. Steam for 6 minutes.

- After steaming, turn off the heat and refrain from opening the steamer lid. Allow the buns to rest undisturbed for another 3 minutes.
- Serve the buns warm. You can keep it in the fridge in an airtight container for 3 to 5 days.
Salted Egg Yolk Custard Bun Recipe
Ingredients
Filling:
- 6 Salted egg yolks sprayed with your choice of liquor
- 20 g corn starch
- 20 g milk powder
- 5 g gelatin
- 60 g warm water
- 40 g lard melted
- 40 g butter melted
- 40 g white sugar
Dough:
- 250 g plain flour
- 10 g white sugar
- 125 g water
- 5 g lard
- 3 g yeast powder
Instructions
Make The Filling
- Spray the salted egg yolks with liquor.
- Place them on a heat-resistant plate and cook in the air fryer or microwave for 10 minutes. Afterward, the yolk becomes semi-solid and creamy like the center of a hard-boiled egg.
- Use a food processor to blend the egg yolks with cornstarch and milk powder. Transfer to a bowl and set aside. This should give you a sandy or grainy blended texture.
- In a bowl of water, soak the gelatin sheets until soft.
- Then, stir in warm water with the soft gelatin until well combined.
- Pour the gelatin mixture onto the egg yolk mixture and continue stirring until well combined. This should create a creamy and thick mixture.
- Add melted lard and melted butter and stir thoroughly.
- Add white sugar. Mix well and refrigerate the filling for an hour. After 1 hour, the creamy mixture should firm up.
- After 1 hour, take out the filling and shape it into small balls, about 20g each.
Knead The Dough
- Combine plain flour, sugar, and water. Mix until it forms clumps.
- Add lard and knead until it becomes a smooth dough. This should take approximately five to ten minutes.
- Dissolve the yeast with a small amount of water.
- Mix the yeast mixture with the dough.
- Knead again until the yeast is fully incorporated into the dough.
- Roll the dough into a log and divide it into 30g portions using a dough cutter or knife.
- Flatten each portion into a small circular wrapper with a thicker center and thinner edges using a rolling pin.
Assemble And Steam The Buns
- Take a dough wrapper and place the filling in the center.
- Seal the bun by pinching the edges together.
- Place the buns on parchment paper.
- Let the buns rise until they double in size.
- Place the buns inside a cupcake paper cup. This can be optional.
- Transfer the buns to your steaming equipment. Steam for 6 minutes.
- After steaming, turn off the heat and refrain from opening the steamer lid. Allow the buns to rest undisturbed for another 3 minutes.
- Serve the buns warm. You can keep it in the fridge in an airtight container for 3 to 5 days.