Festive Snow Skin Mooncakes
The Mid-autumn festival is a celebration worth waiting for! What better way to celebrate this joyous occasion than by making your very own delicious snow skin mooncakes? Snow skin mooncakes are irresistibly soft, bursting with a variety of delectable fillings! This no-bake recipe is uncomplicated and can make about 10 pieces of snow skin mooncakes.
Equipment
- Mixing bowl
- Whisk
- Clean wrap
- Steamer
- Kitchen gloves or food-grade gloves
- Mooncake mold
Ingredients
- 50 g of glutinous rice flour
- 50 g of regular rice flour
- 35 g of wheat starch 澄粉
- 30 g of sugar
- 20 g of corn oil
- 200 ml of milk
- Natural coloring ingredients
- green matcha powder
- purple potato flour
Filling: I use my custard filling recipe, which contains the following:
- 4 egg yolks
- 50 g white sugar
- 180 g milk
- 30 g milk powder
- 40 g all-purpose flour
- 40 g cornstarch
- 30 g butter
Instructions
- Make The Custard Filling
- Whisk the egg yolks, white sugar, milk, milk powder, flour, cornstarch, and butter in a mixing bowl. Whisk until smooth and free of lumps.
- Strain the mixture with a strainer and heat on low heat in a non-stick pan.
- Stir continuously and continue heating until paste-like and thick enough to form a ball.
- Divide the custard filling into equal parts and shape each into a 20g round ball.
- Cook The Batter
- In a bowl, add the glutinous rice flour, regular rice flour, wheat starch, sugar, corn oil, and milk. Mix all the ingredients thoroughly using a whisk.
- Pour the mixture into a steam-safe bowl and cover it with plastic wrap.
- Steam the batter for 20 minutes.
- Allow it to cool after steaming.The mixture should become firm to hold its shape but soft for kneading.
- Knead And Shape The Dough
- Knead the dough for about 5 minutes. Use kitchen gloves to make it easier to handle without sticking.
- Then, wrap it with plastic wrap and refrigerate it for 1 hour. Make sure it is sealed so that no air can enter.
- Next, divide the dough into three equal portions.
- Add the coloring ingredient to two dough portions: one with matcha powder and another with purple potato flour.
- Knead each portion thoroughly until the color is evenly distributed.
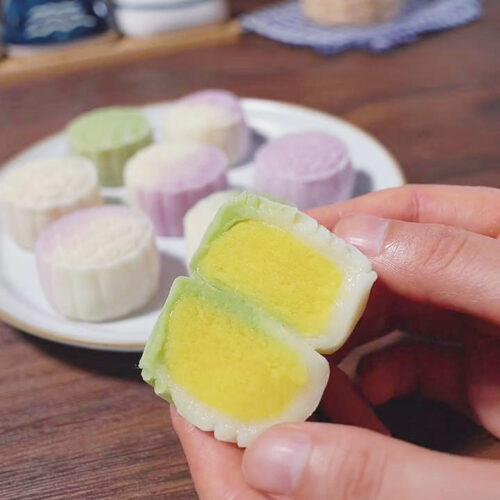
- With the three dough portions, create smaller balls or "ice skin" by combining two colors or making single-colored balls. As you can see, I created white, green, purple, purple with white, and green with white balls.
- Create portions of 30g balls of "ice skin" and 20g of the custard filling.
- Flatten each ball into a small circular wrapper and place the custard filling in the center.
- Seal the filling inside the 'ice skin' and dust it with cooked glutinous rice flour to prevent sticking.
- Use the mooncake mold to create decorative patterns on the mooncakes. Before placing it in the mold, tap off any excess flour from the dough. To help it unmold smoothly, lightly dust the mold before molding it.
- Gently remove the cake from the mold by pressing the screw rod or spring bar slowly.
- Chill the mooncakes in the fridge to serve them cold. Pair these mooncakes with other special goodies like Chinese Turnip Cake (Lo Bak Go), Homemade Chinese Fa Gao (Fortune Cake), and Chinese Water Chestnut Cake (Ma Tai Gou).
Video
Nutrition
Calories: 448kcalCarbohydrates: 55gProtein: 10gFat: 21gSaturated Fat: 9gPolyunsaturated Fat: 3gMonounsaturated Fat: 8gTrans Fat: 0.3gCholesterol: 229mgSodium: 123mgPotassium: 287mgFiber: 1gSugar: 28gVitamin A: 673IUVitamin C: 1mgCalcium: 215mgIron: 1mg
Tried this recipe?Let us know how it was!